My neighbours know Spring has sprung when they see the same strange ritual at the bottom of my garden. It was a beautiful sunny day in the Midlands today so it was perfect weather to start boring and filling the holes in my parsnip drums.
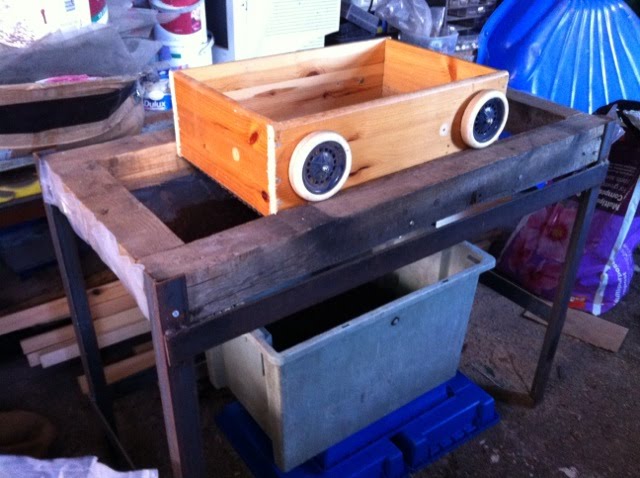
First thing first though, I had to prepare my mix. This meant bringing my sieving machine out of its long winter hibernation. A few repairs had to be made to the box, basically a four side wooden affair with a metal perforated bottom. By filling it with compost and rocking it back and forth over the outer wooden frame by way of the old pram wheels, the compost falls through the 6mm holes in the metal base leaving all the hard lumps and bits of twig and other crap that the manufacturers bulk the compost up with behind. You can't see in the photo but a plastic sheet is stapled to the bottom of the outer frame. A hole in the centre of that allows the fine compost to fall into the large green collecting box. This set up really saves on back strain and I can zip through a 75L bag of compost in 20 minutes

I modified my mix slightly this season by adding more nutrients than usual, because the drums are higher by about 8 inches:
15 litres sieved multipurpose compost (with added wetting agent)
4 litres medium grade vermiculite
3 litres silver sand (play sand)
3 litres sieved sterilised topsoil
3 oz superphosphate
3 oz sulphate of potash
3 oz Tev-04
3 oz calcified seaweed
6 oz garden lime
The reason for the extra lime was that I was told canker doesn't like lime so as well as other precautions I'll be taking to stop the spores landing, if they do they'll hopefully find the mix not to their liking. Make sure everything is well mixed. I do everything by hand but ideally you want to buy a cement mixer for the job and leave it running for several minutes. If mixing by hand, a good little tip is to mix all the lightweight ingredients and nutrients before adding the sand and soil. In this way you should get more even distribution of the nutrients. Next step is to core out the holes using a length of 3 inch diameter plastic piping. The drums are first given a good drenching and then left for 20 minutes to allow the water to sink into the top few inches. This stops the sand collapsing at the top if it's too dry when you start boring. In the past i've actually got 7 holes to each drum but I've reduced it this season to try and get bigger and better roots. I do it all by eye, and the sand that is extracted is simply emptied into my nearby (and for now, empty) stump carrot bed.

Next step is to bore out the cored holes with a stout metal crowbar. Mine is about 5' long. I go from hole to hole, turning the bar in circular motion until I end up with a conical hole. By forcing the bar down after each turn you can gradually increase the depth so that the bar is only just above the top of the hole.

The final and most pleasing task is to put the mix into the bore hole. I have a metal funnel that makes this a very quick operation. Don't ask me why but I always start with the middle hole then the ones at the back. When the mix is near the top I compact it down with my hand then top up with more mix. After all the holes are filled, I'll water the top of the drum and then put a small indentation in the centre of each hole with my finger. The drum is then covered with a pane of glass to keep cats off. The mix above only did 6 and a bit holes this season because of the extra depth, whereas last year I was getting 10 and a bit. I've filled 3 drums of 5 so far and will get up early tomorrow to do another couple before I go to TEGS.

All I need to do then is to chit some seeds indoors on some wet tissue paper and carefully place the seeds in the indentations with the root radicle pointing downwards. I'll start some seeds off towards the end of next week.
The variety i'm growing this year is Polar because it appeared to resist canker last season for me far better than Pinnacle.