Search This Blog

Wednesday, February 28, 2007

Same parsnip bed June 2006


This is a picture of the same parsnip bed in June of 2006 and you can see the young vigorous plants through the green netting. The netting helps to keep aphids off and also filters the wind and prevents breakages.
The glass panes over the top serve two purposes...in the early days they stop cats from digging the sand and leaving their deposits (I like cats.....but when they do that in my well prepared beds I could quite happily kill one....even ours!) and also keeps off excess rainwater. The idea is to keep the bed as dry as possible so that the tap root of the parsnip goes down in search of moisture. As the sand is a supposedly sterile medium the roots only stay in the compost mix that you trickle into the bore holes (see yesterday's post).
There should be no need to feed during the growing season as the compost mix has various fertilisers in it. I don't usually suffer from parsnip canker growing them in this method either and the roots do tend to come up quite clean with the minimum amount of cleaning required.
In 2006 I got 22 'station's in this bed but some of them turned out far too small so I'm going to decrease the amount I grow in this bed in the hope that the extra room will help them swell out a bit more.

Monday, February 26, 2007

Preparing Parsnip beds


This weekend will see me sowing my parsnips in raised beds and the pics above show the sequence of events that will take place.
Top left: I have constructed a raised bed from slabs on end with a timber frame on top of that. The whole thing has been filled with coarse sand and sterilised a few weeks ago in order to give it time to settle. Conical holes are bored with a stout metal rod about 4" diameter at the top and some 3-4 feet deep (Top growers will bore twice this depth!). I get about 18 or so in this bed but they're really a bit close for top level exhibiting, and I never seem to get heavy specimens.
Top right: The compost mix will have been prepared beforehand and sieved to remove any lumps. Carefully trickle it into each hole in turn......
Bottom left: ...........prodding with a cane every now and then to make sure there are no air pockets lower down.
Bottom right: The completed bed with all stations ready to accept the seed.
The seed is in my kitchen on moist tissue paper. As soon as the tiny white root radicle is showing through I will carefully place them into each station. This way I KNOW the seed has germinated. Parsnips are notoriously slow to germinate and if I sowed straight outside I could be waiting for weeks thereby losing valuable growing time.

Wednesday, February 21, 2007

I have a cunning plan........!

I've done what I said I was going to do and made a cropping plan of my veg plot so that I know exactly what I'm going to grow in each bed and where. That way I won't be tempted to grow too much and any plants that are left over will simply be given away. Too often in the past I've fallen into the trap of squeezing in those extra few seedlings that I've grown because I couldn't bear to throw them on the compost heap. It's false economy and you have to be ruthless.

Last night (after watching Man U's glorious victory against those mardy French gits) I sowed a pot of red onions. They don't usually win in the quality onion classes but I have a plan to grow as many red/purple veg of different types for entry into the 'trug of veg' classes. I think a basket full of dark coloured veg could look quite striking. So as well as red onions there'll be red tomatoes (obviously), radishes, purple carrots, aubergines, purple sprouts, beetroot, purple french beans, red potatoes etc etc.

I hope it'll look stunning and catch the judges eye. But there's a long way to go yet!

Saturday, February 17, 2007

Long time no post!


Been a busy few weeks at work and socially so it's a good job the weather's been against me as far as getting any gardening done.

I have however managed to empty the sand out of my parsnip beds and refill it, sterilising each 8" layer as I went along with Jeyes Fluid. I'll be sieving my mixes (more on this soon) in the next couple of weeks so that I can sow them early March.

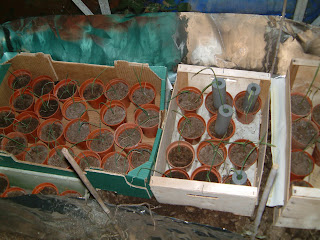
My exhibition onions and leeks came last week from Vin Throup the legendary onion grower(saves having to grow your own and keeping them under lights and heat). They were all potted up into 3" pots and put into the greenhouse in a boxed off area to keep the frost off. A grolight over them keeps them ticking along nicely.

Apart from that I have only the shallots and a few potted up onion sets in the greenhouse. I'm hoping to empty my carrot drums out tomorrow and refill them, weather permitting. This afternoon I'm driving over to Ockbrook near Derby to collect my potatoes from Exhibition Seed Potatoes (ESP). The varieties I'll be growing this year are Winston and Nadine (whites) and Kestrel, Amour and Maxine (coloureds).

I've also just completed a 5 page 'showing hints' guide for publication on the website of my local show, as well as racking my brains for ideas for different classes.....we like to mix it up a bit each year to stop things getting stale.